
A lab incubator is a vital piece of equipment in any lab, but reliable results require proper use and maintenance of your unit. What’s more, some models can get pretty pricey and you’d probably prefer not to have to replace your machine too often.
Following best practices for using and maintaining your lab incubator can ensure it works correctly for your application and has as long a lifespan as possible. Those best practices include:
- Place your unit properly
- Monitor temperature
- Monitor humidity and CO2
- Clean the incubator regularly
- Calibrate on a regular basis
In this post, we’ll look at each of these in detail.
1. Place Your Unit Properly
Proper positioning of your unit can ensure it runs efficiently and has minimum exposure to potential contaminants. Here are the factors you need to consider when deciding on the perfect spot for you lab incubator:
- Doorways and vents can blow in contaminants and increase the chance of fungal growth. What’s more, they can create drafts which can affect the temperature stability of your unit.
- Direct sunlight can cause temperature fluctuations and issues with anti-condensation features.
- You need enough space (at least three inches) around the unit so that heat can vent and cords and sockets are easily accessible.
- Place floor incubators on a stand to limit the risk of contaminants sweeping in when the door is open.
- Avoid humid, damp areas that may be harboring fungal growth.
- Place units away from sources of vibration such as shakers, stirrers, or refrigerators, as vibrations can affect cell growth.
- Ensure the area around the unit is as clean as possible.
Ideal conditions for a lab incubator would be in a temperature-controlled environment and cleanroom conditions. As that is often not practical nor feasible, taking into account the factors above will suffice for most applications.
2. Monitor Temperature
Incubators are often maintained at 37°C for optimal growth of cell cultures. Deviations in temperature could inhibit growth or even destroy cultures. Temperature sensors are included units, but how do you know that you can always rely on your sensor? One way to ensure the correct temperature is use a second thermometer.
If your incubator has a glass door, you can attach a calibrated thermometer to the inside of the glass and read it without having to open the door. You can check this against the sensor temperature and if they’re different, you know the sensor needs to be recalibrated.
Avoiding opening and closing the door unnecessarily can help keep the temperature stable (and prevent contaminants from entering the chamber). If you’re concerned about the incubator door being inadvertently opened, you can opt for a unit with a door lock.

The TH-G Temperature and Humidity Chamber has a lock and key whereas the IL Air-jacketed Low Temperature Incubators comes with a keypad lock.
3. Monitor Humidity and CO2
Optimal growth conditions for cell cultures also include a specific humidity level and in some cases, CO2 level. Tissues and cells are sensitive to changes in these parameters, so they need to be monitored closely.
If the humidity is too low, there’s a chance your cell culture media can evaporate or your growth media may become too concentrated. Ideal humidity is usually around 95%, and to keep it at this level, you need to make sure the water tray (under the incubator) is never at risk of running dry.
For CO2 incubators, you’ll need to monitor the CO2 level. This is typically kept at 5% to maintain a constant pH for optimal growth. CO2 sensors help here by signalling when and how much CO2 needs to be added to the chamber. You can check CO2 levels using an external gas analyzer every few months.
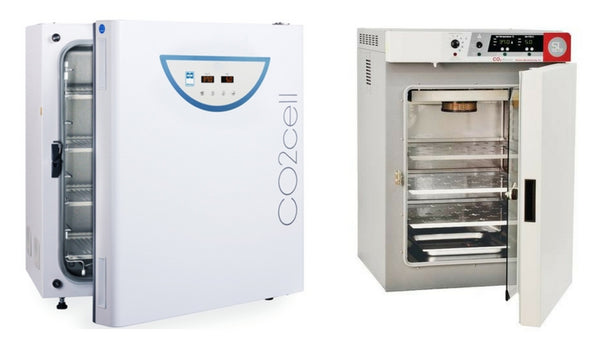
The CO2Cell Incubator and the SCO Air Jacket CO2 Incubator both utilize IR sensors.
4. Clean It Regularly
If your incubator is contaminated, it’s likely your results will be negatively impacted. As such, it’s important to stick to a strict cleaning schedule for your unit. Some key steps to follow are:
- Always wear gloves when handling containers to be placed inside the unit.
- If using a humidity pan, change the water in the pan at least once per week.
- Clean the humidity pan, chamber, shelves, and any other removable parts regularly. Depending on the application, disinfection may be sufficient, or complete sterilization might be required. Make sure any disinfectants used won’t harm your cell cultures or corrode the incubator chamber. Quaternary ammonium disinfectant is one of the best options for many applications.
- Remember to clean the outside of the unit, especially the door handle.
- Clean the fan and fan wheels every few months.
- Some lab incubators include HEPA filters, which trap fine particulate matter present in the incoming air to reduce the potential for chamber contamination. Filters should be replaced every six months to one year.
Note that some units have a built-in automated decontamination cycle which can be run after regular cleaning.

The SCO Decontamination CO2 Incubator features a dry heat decontamination cycle which maintains 180°C for 120 minutes.
This ResearchGate thread stemming from an issue with fungal growth in a CO2 incubator prompted a slew of advice for cleaning a CO2 incubator. Here are some of the standout tips:
- Spray all parts (including cracks and crevices) with an anti-fungal spray (such as Biocidal ZF or Aniospray) to inhibit fungal growth.
- Place removable parts in a dry heat oven for several hours or autoclave them, before reassembling.
- Use autoclaved water in the water bath.
- Consider adding copper sulfate or another germicide (a solution of ethanol, glycerol, and sorbic acid is one suggestion) to the water.
- If you have a UV lamp, place the water container under it after regular cleaning.
- Place a UV lamp inside the incubator after cleaning.
- Leave a pan of 70% ethanol in the incubator overnight.
- Consider having a professional fumigate incubators annually.
Note that these may not be suitable for every application, but could be worth considering if you’re running into contamination issues.
5. Calibrate the Temperature Regularly
We discussed monitoring temperature above, but thermometers should also be validated and calibrated on a regular basis. The exact schedule will depend on your application, but every month is a good guide. The unit should also be recalibrated if validation determines as the need for it and after anomalous events such as a power outage or a spill cleanup.
For reproducible results, calibration should be carried out at the usual operating temperature. For incubators used in important or sensitive experiments, you should also consider arranging calibration by an external agency on an annual basis.